I have been looking at IOTA since last winter, as it seems promising for IoT, Machine-to-Machine Micro-payments and Data Market scenarios.
Installing an IOTA light wallet is pretty straightforward, but running a full node is not. But thanks to the great playbook, I managed to setup a Virtual Private Server to run as an IOTA full node.
It has be been a while since my last post. It is because I was quite busy leading a team in a program for delivering veracity.com, the open industry data platform from DNV GL. It is a pretty exciting project - to build an open, independent data platform with bleeding edge technologies, to serve a large user base (100 000 registered users). You can read more about veracity at here and here.
It actually is a long and interesting story behind veracity (and its predecessor), together with all challenges that we encountered in this journey. Hopefully I can share them with you in the future.
Anyway, today I would like to talk about in the real world, how Infrastructure-as-Code looks like, together with Azure and VSTS.
Recently we need to build a Nodejs single-page-application (SPA) solution that is using Azure AD B2C as the identity provider (idp). Since it is a single-page-application, we are going to use OAuth2 Implicit Flow.
This article demonstrates the basic steps for setting up both the server side (WebAPI) as well as the client application.
Having several digital cameras is fun: you can have different photography experiences.
However, organizing pictures is far less interesting, especially if you do not have a consistent process (like naming convention) for archiving. After several years, I end up with hundred thousand pictures sitting in messy huge folders:
Nikon_Pictures
Backup_SDCard01
100_0302
DCIM_From_Old_Phone
100CANON
Backup-Photo
etc…
The most tricky part, is that I have so many duplicate pictures everywhere due to inconsistent archiving during years. It is so messy that I never dare to manually clean them up.
Naturally, the knowledge of programming came to my rescue. This time, it is Python.
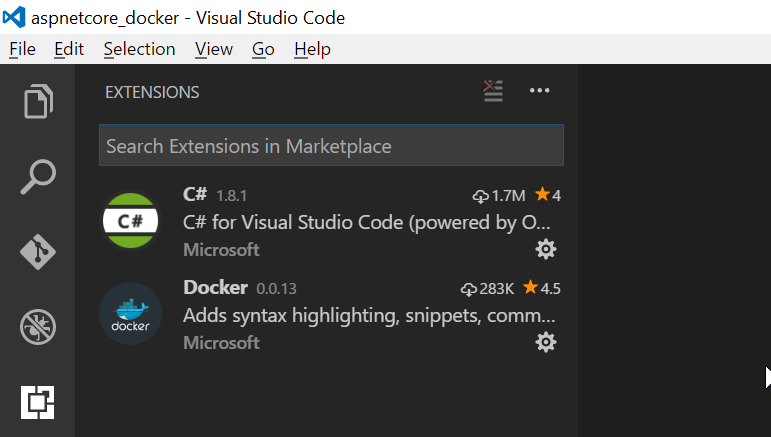
I have a typical developers environment: Windows 10 Enterprise X64 (Version 1511, OS build 10586.839). Installed DotNet Core 1.0.1 and VS Code. In VS Code there are two extension installed.
Enable Hyper-V
VirtualBox is no longer needed! Simply enable the Hyper-V on on Windows 10 by running powershell commands (as Administrator)
You might need to change the BIOS setting. Read more at here.
Note: The document from Docker also mentioned that the virtualization must be enabled, and said you can verify it in the Task Manager. However, I can not find “Virtualization” label in my Task Manager. But the following steps work fine anyway.
Install Docker
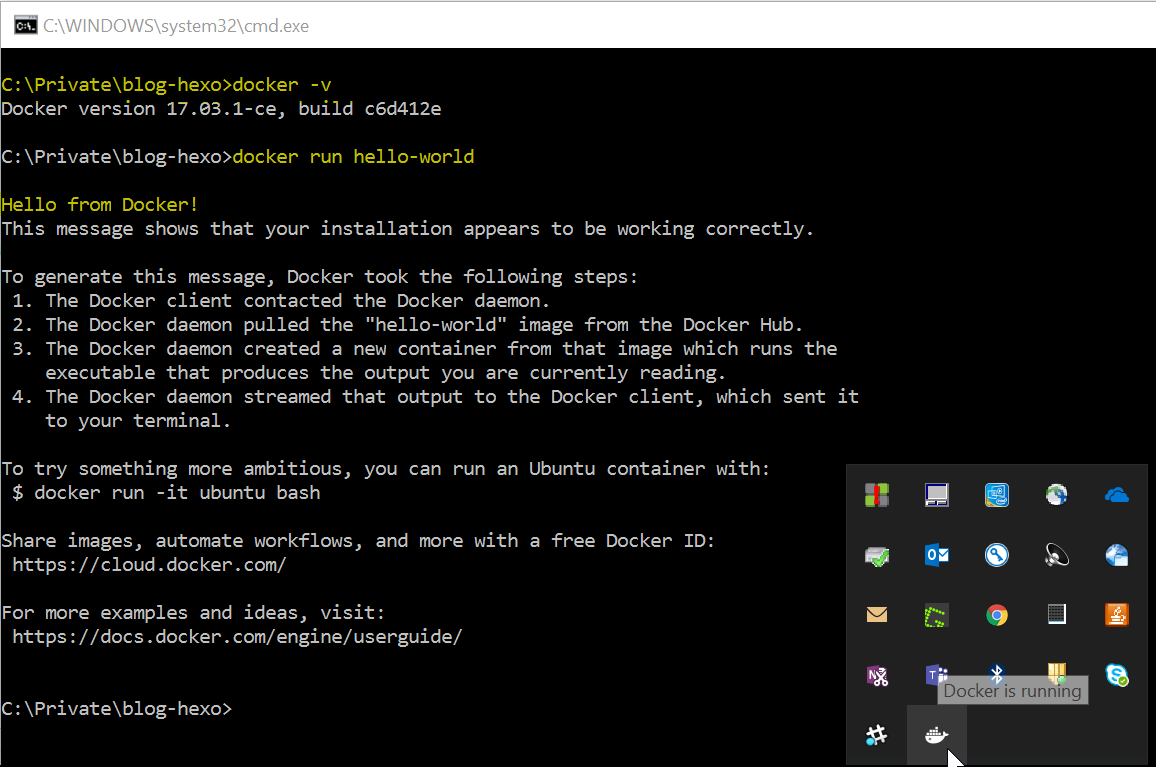
Head to Docker official site, download and install Docker for Windows. The version I installed was 17.03.1-ce, build c6d412e Community Edition, via Edge channel.
We have a large distributed system which is hosted in Azure. The front end web application are Azure web sites.
From time to time, the web applications were down, due to running out disk space in the Azure web sites. Our operation team would like to quickly identify what are the large files and how we can free up disk space in Azure web sites.
Lucky, Azure application service already provides a nice tool for this type of work: Kudu service.
We cannot register a private build agent on VSTS by using a service account. This service account has created Personal Access Token with expiration for 1 year and authorization for all scopes.
Whenever we run the config.cmd, then connecting to the server, type the Agent Pool and Agent Name, configuration command throws error.
No agent pool found with identifier 0.
Failed to add the agent. Try again or ctrl-c to quit
However, with the same build server and with another developer’s account, it works fine and the build agent is up and running.