Recently we need to build a Nodejs single-page-application (SPA) solution that is using Azure AD B2C as the identity provider (idp). Since it is a single-page-application, we are going to use OAuth2 Implicit Flow.
This article demonstrates the basic steps for setting up both the server side (WebAPI) as well as the client application.
Setup your own Azure AD B2C
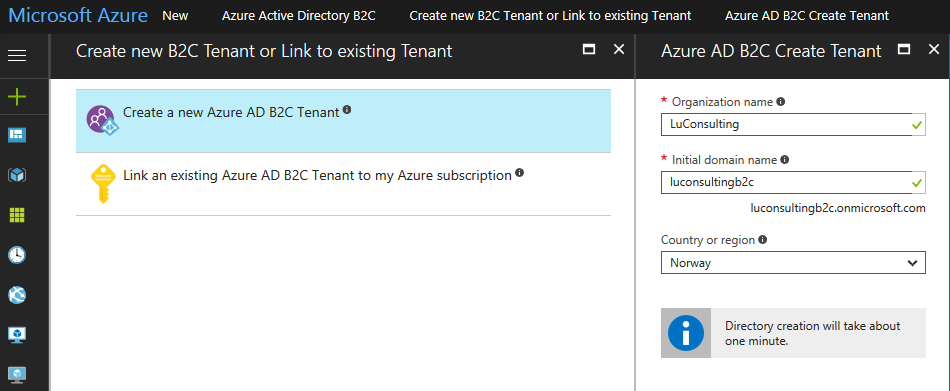
Create an Azure AD B2C tenant
First of all, let’s create an AAD B2C tenant with domain luconsultingb2c.onmicrosoft.com by following the steps in this document.
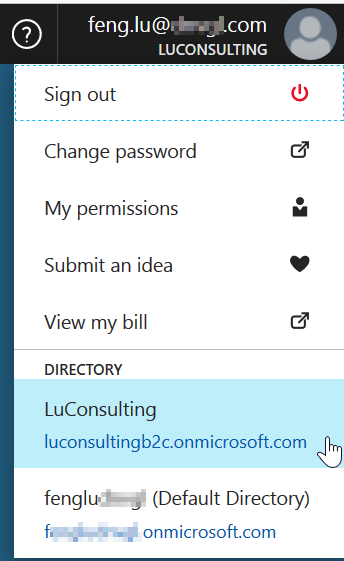
Then you can switch by using the top-right menu
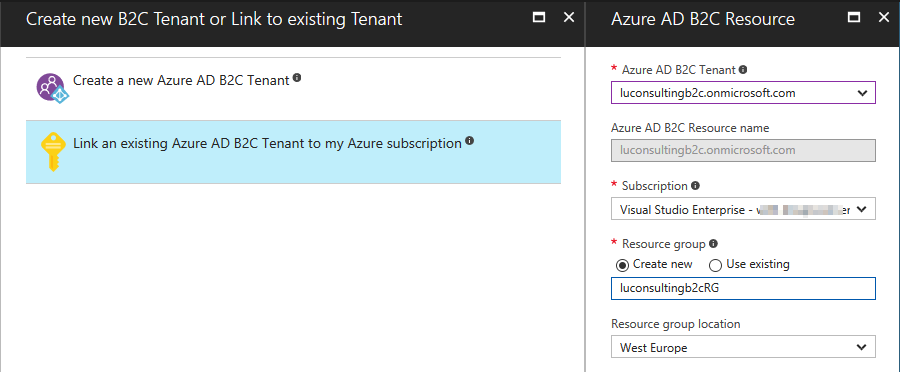
If you want, you can connect the AAD to an existing Azure subscription
Now you can start using this tenant
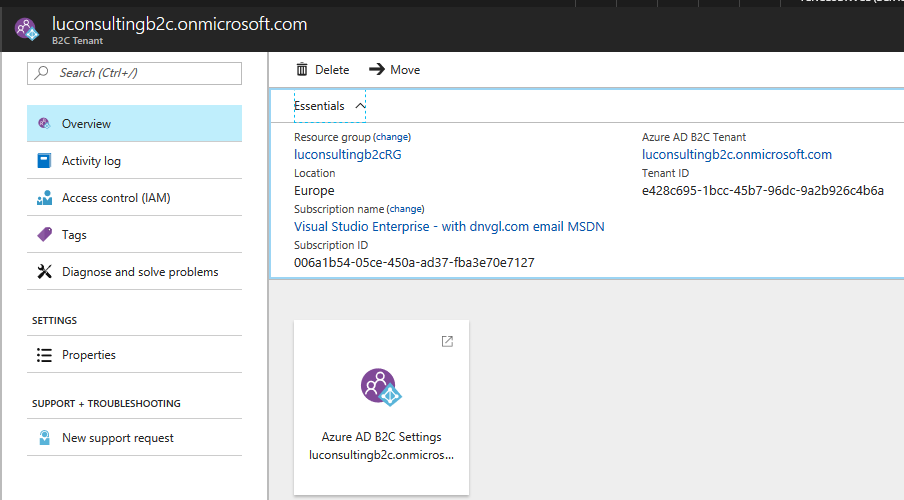
Configure Linkedin as an identity provider
Follow the step in Azure Active Directory B2C: Provide sign-up and sign-in to consumers with LinkedIn accounts.
- Create a Linkedin App to generate the client id and secret
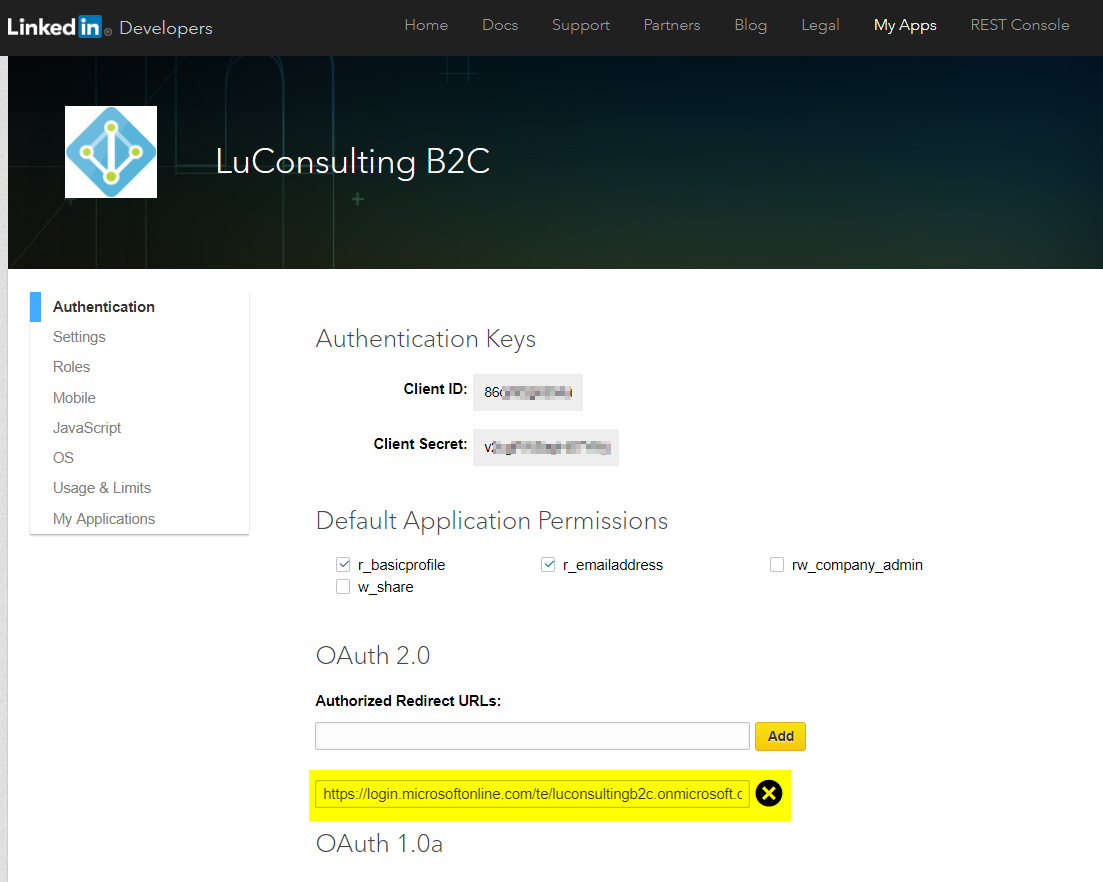
- Add Linkedin as an identity provider in AAD B2C, together with Email as local accounts
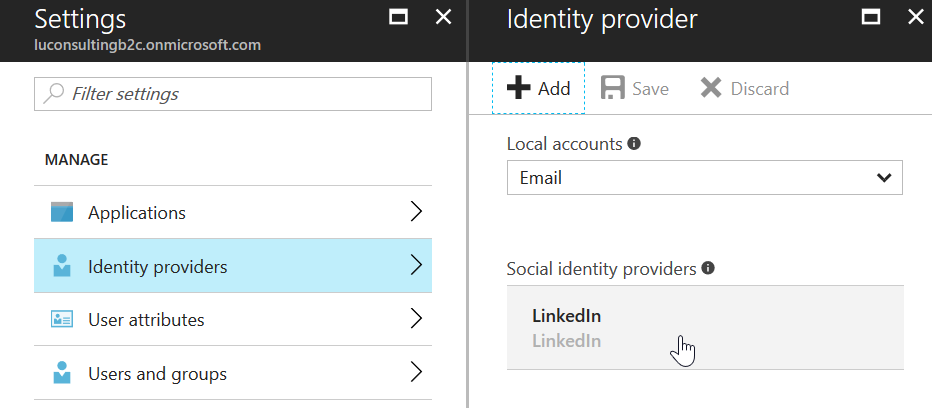
Remember to give it a meaningful name for your Linkedin idp, as the name will be used in the login page. (Do not use “LI” as the Microsoft article suggested)
Create policy
- Now create a Signup/Signin prolicy by following the steps in Azure Active Directory B2C: Built-in policies.
We name this policy “SiUpIn”, and it will be automatically renamed “B2C_1_SiUpIn” (the B2C_1_ fragment is automatically added) - When user sign up, I would like to ask for Given Name, Surname Name, Email Address, Display Name, Job Title and Country/Region
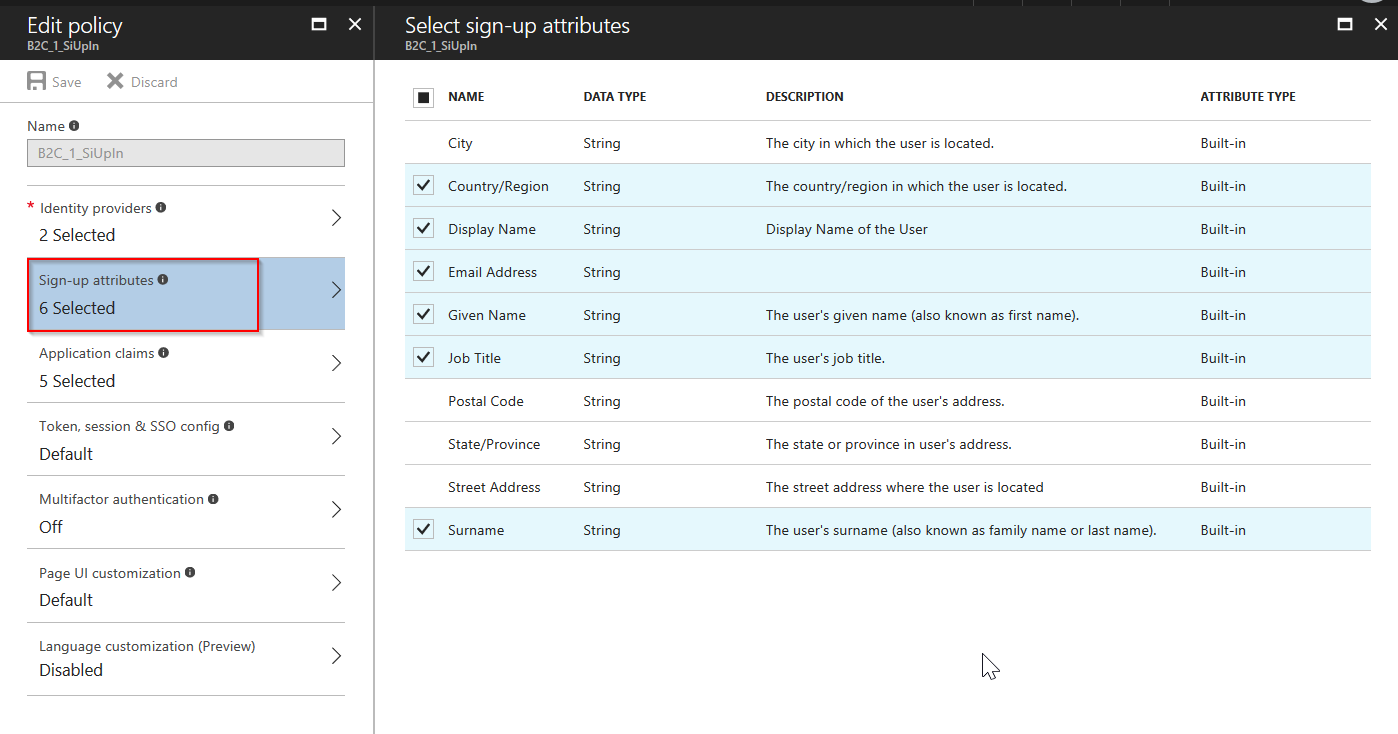
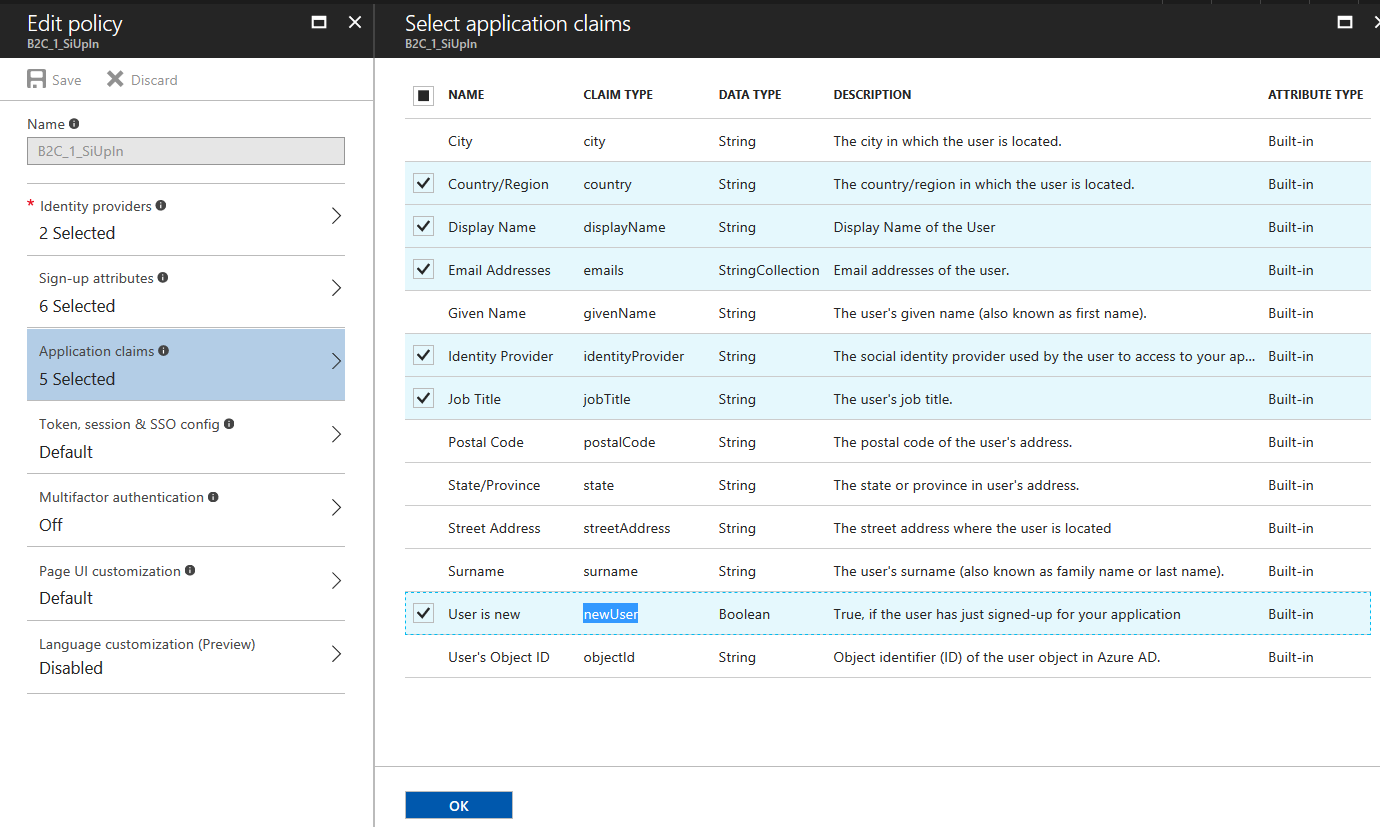
- After sign in, I would like to have Display Name, Country/Region and Job Title to be included in the claim. In addition, I want to know the idp and if newUser is true, so select them.
- Done
Create and register your WebAPI
Register your WebAPI
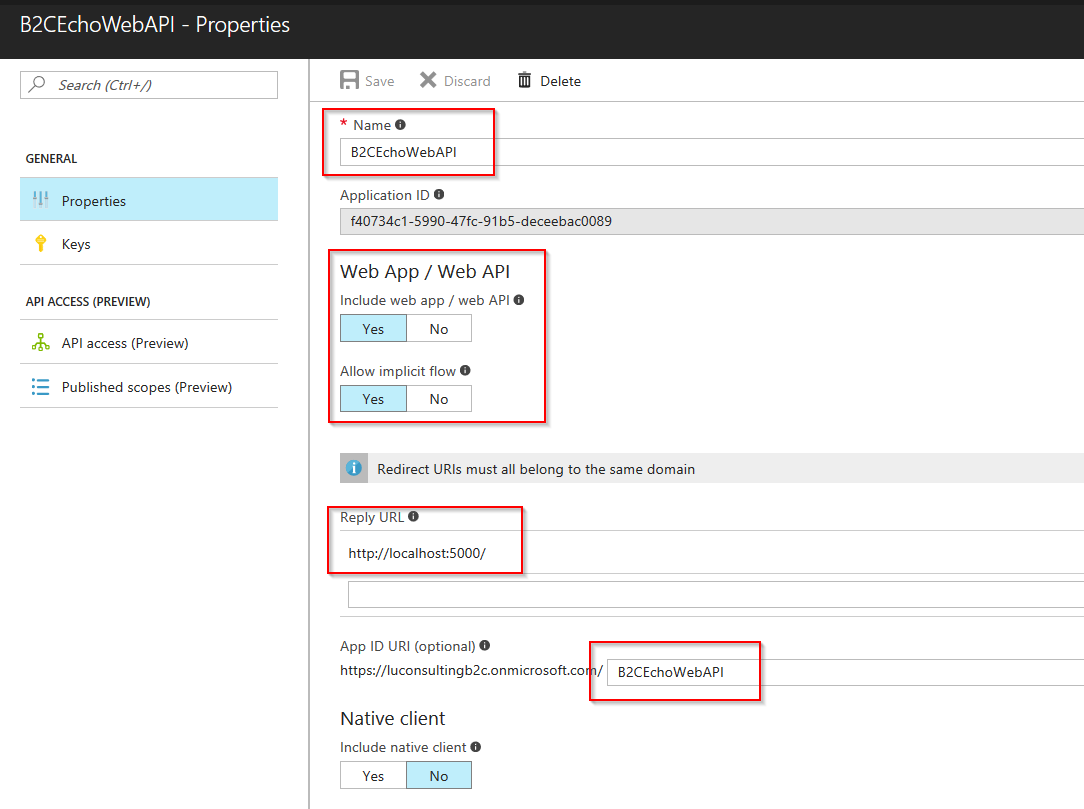
Follow the steps in Azure Active Directory B2C: Register your application to register a web api named B2CEchoWebAPI
Note:
- Enable the Web App/Web API setting for the web api.
- Reply URL to http://localhost:5000/ as we will run the web api there.
- HTTP protocol is allowed as far as it is for localhost. If it is external, we have to use HTTPS.
- Even the App ID URI is marked as optional, this is needed to construct the scopes that are configured in you single page application’s code
Setup policy
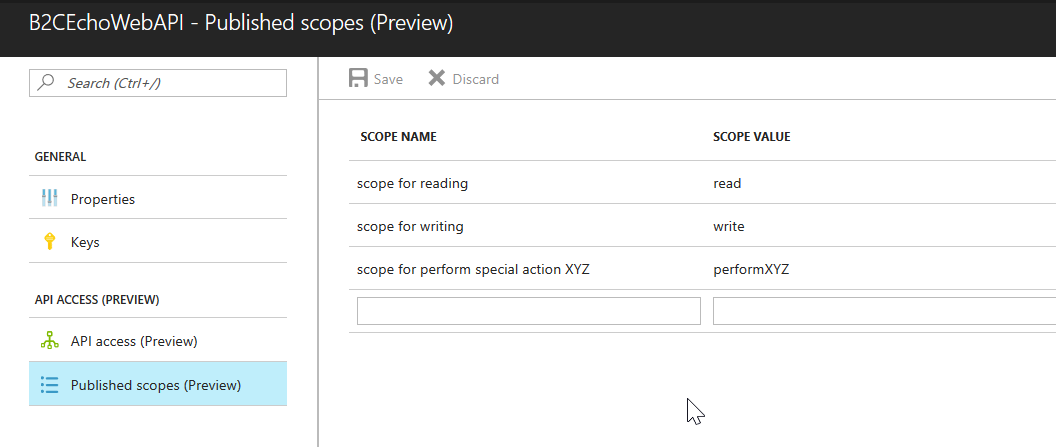
Once Web API is registered, open the app’s Published Scopes blade and add any extra scopes you want.
Note:
- The scope is used for controlling permissions: an access token defines the permissions that are granted to the bearer of the token. The permissions are defined by you (the API owner) and you control what happens when your API receives a token with that permission.
- In this case, I define 3 permission levels: “read”, “write” and “performXYZ”.
- When the API receives a token that has the “read” value in the scope, the API will do actions that I think are okay for a user that has a “read” permission.
- Microsoft document mentioned that there is a default scope “user_impersonation”, but it is not mandatory. AAD B2C doesn’t care what the permission values are. It simply ensures that scopes that are requested are valid and then generates a proper token when they are valid. It is up to you what you want your API to do when it receives an access token with a permission called “user_impersonation”. The “user_impersonation” scope is there by default because there needs to be at least one scope defined when a user requests a token, and you can use the “user_impersonation” to be that scope.
- By default, applications are granted the ability to access the user’s profile via the “openid” permission, and generate refresh tokens via the “offline_access” permission. But you do NOT need to specify them here.
Write down the AppID URI and Published Scopes values, You will need them in your client application code. The format for calling will be “https://{tenent}/{AppID URI}/{scope value}”, for example “https://luconsultingb2c.onmicrosoft.com/B2CEchoWebAPI/performXYZ“.
Create a Nodejs based web api
In this case, I am using a forked version of Microsoft sample code, with small modification. You can access it at https://github.com/linkcd/active-directory-b2c-javascript-nodejs-webapi.
Packages
It is using the common passport and passport-azure-ad for AAD strategies.
Code for authentication
(full code is at https://github.com/linkcd/active-directory-b2c-javascript-nodejs-webapi/blob/master/index.js)
1 | var express = require("express"); |
Then define API endpoint
1 | app.use(function (req, res, next) { |
Now run it at local
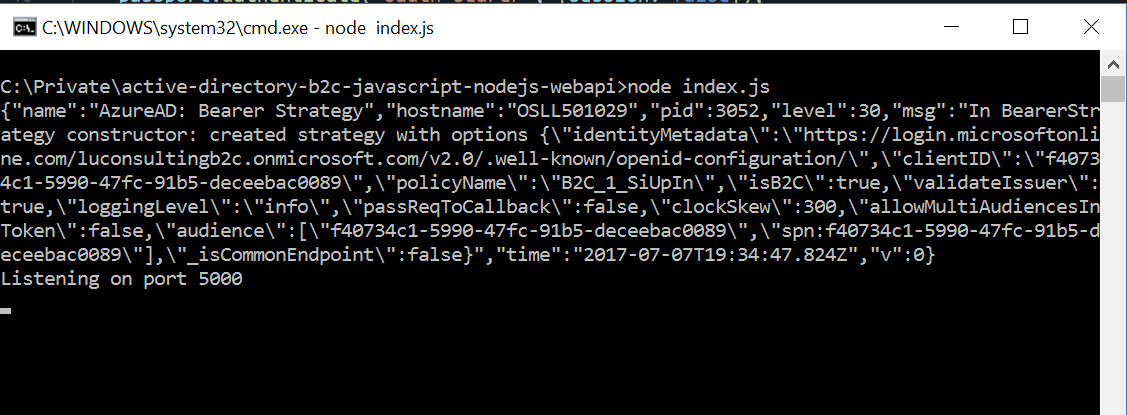
And confirm that the endpoint is protected
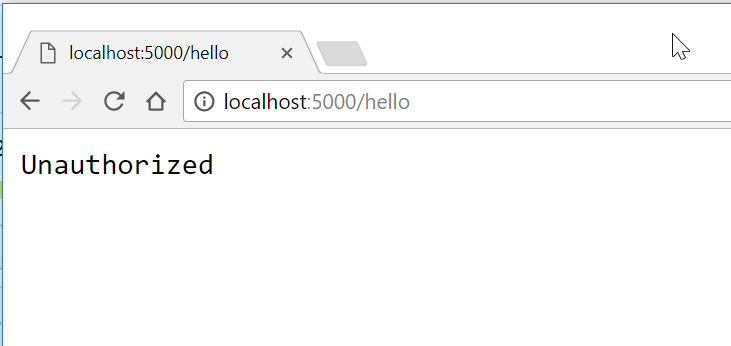
Now the Web API part is done, let’s move to the client part.
Create and register your client app
Register your client app
Follow the steps in register your single page application in your B2C tenant, so that your client has its own Application/client ID.
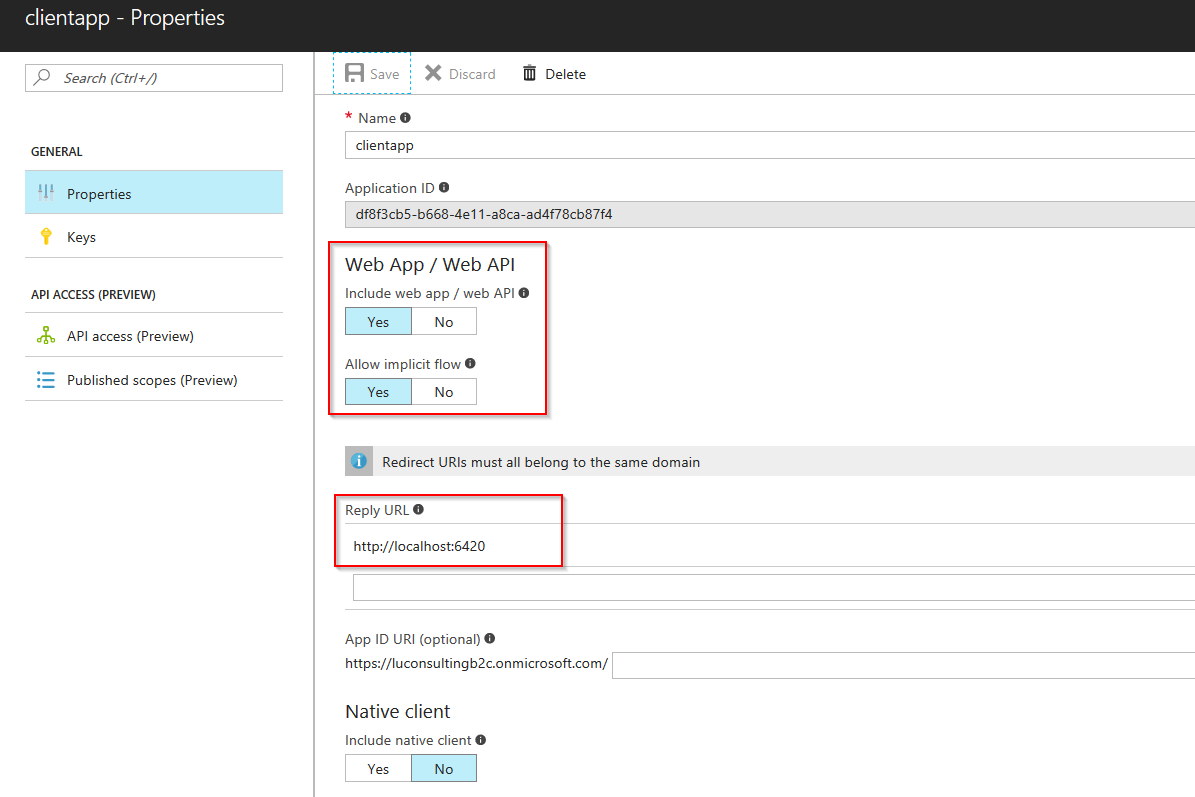
Note:
- Enable the Web App/Web API setting for the web api.
- Reply URL to http://localhost:6420/ as we will run the client app there.
- HTTP protocol is allowed as far as it is for localhost. If it is external, we have to use HTTPS.
Grant the client app access to the web API
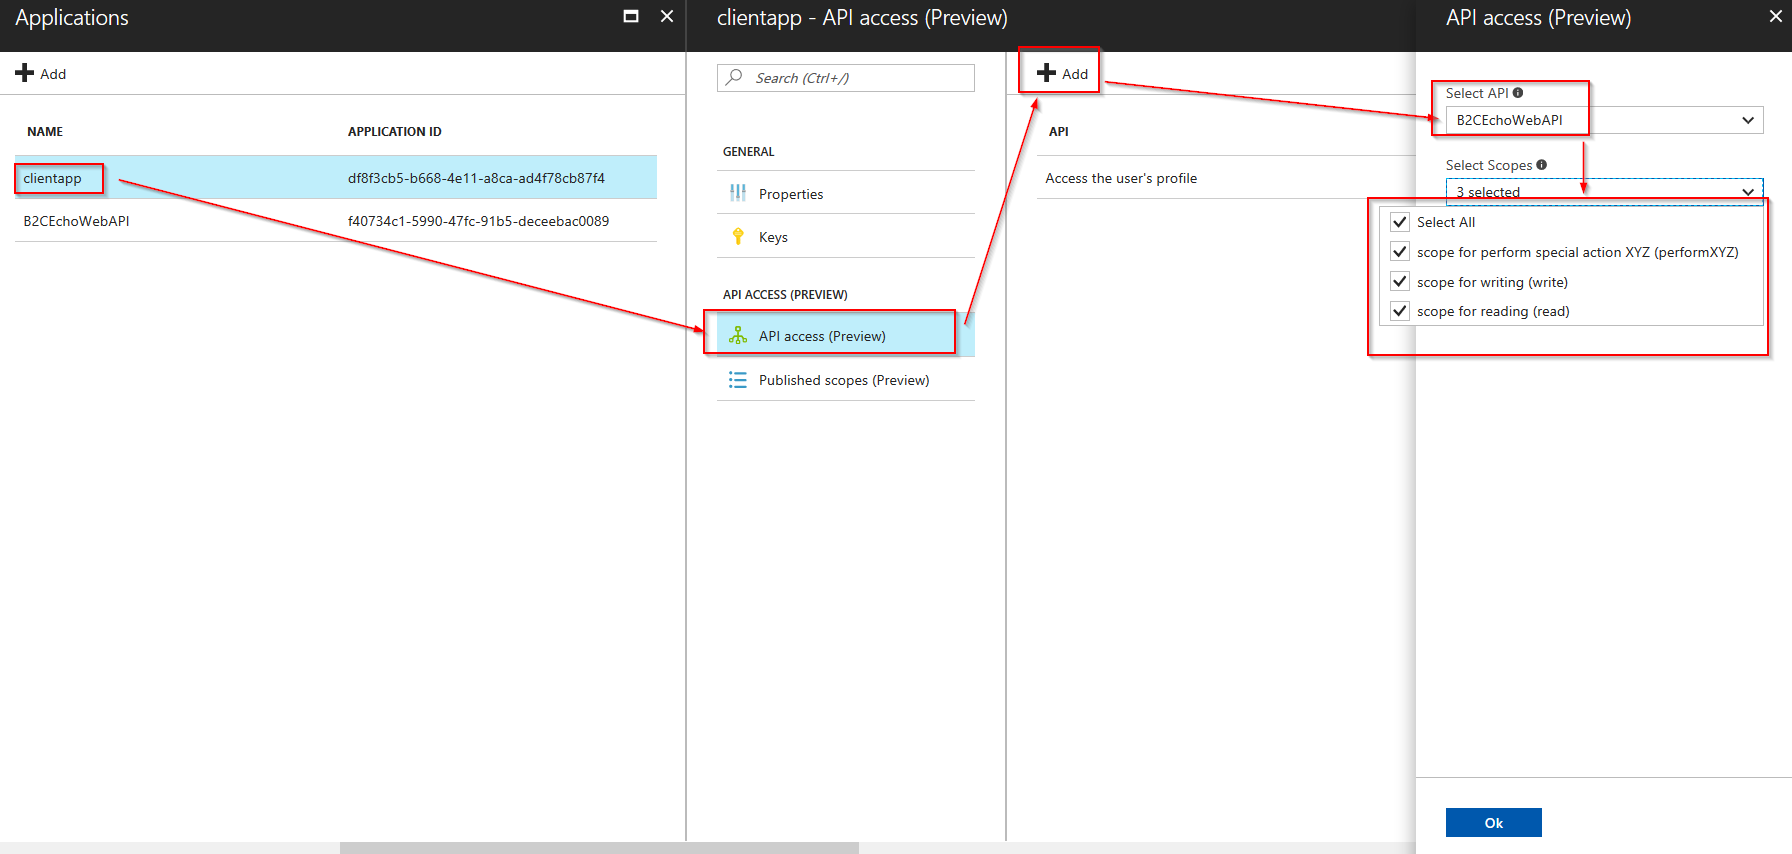
Create the client app
Again, I am using a forked version of Microsoft sample code, you can find it at https://github.com/linkcd/active-directory-b2c-javascript-msal-singlepageapp
1 | <script class="pre"> |
Test
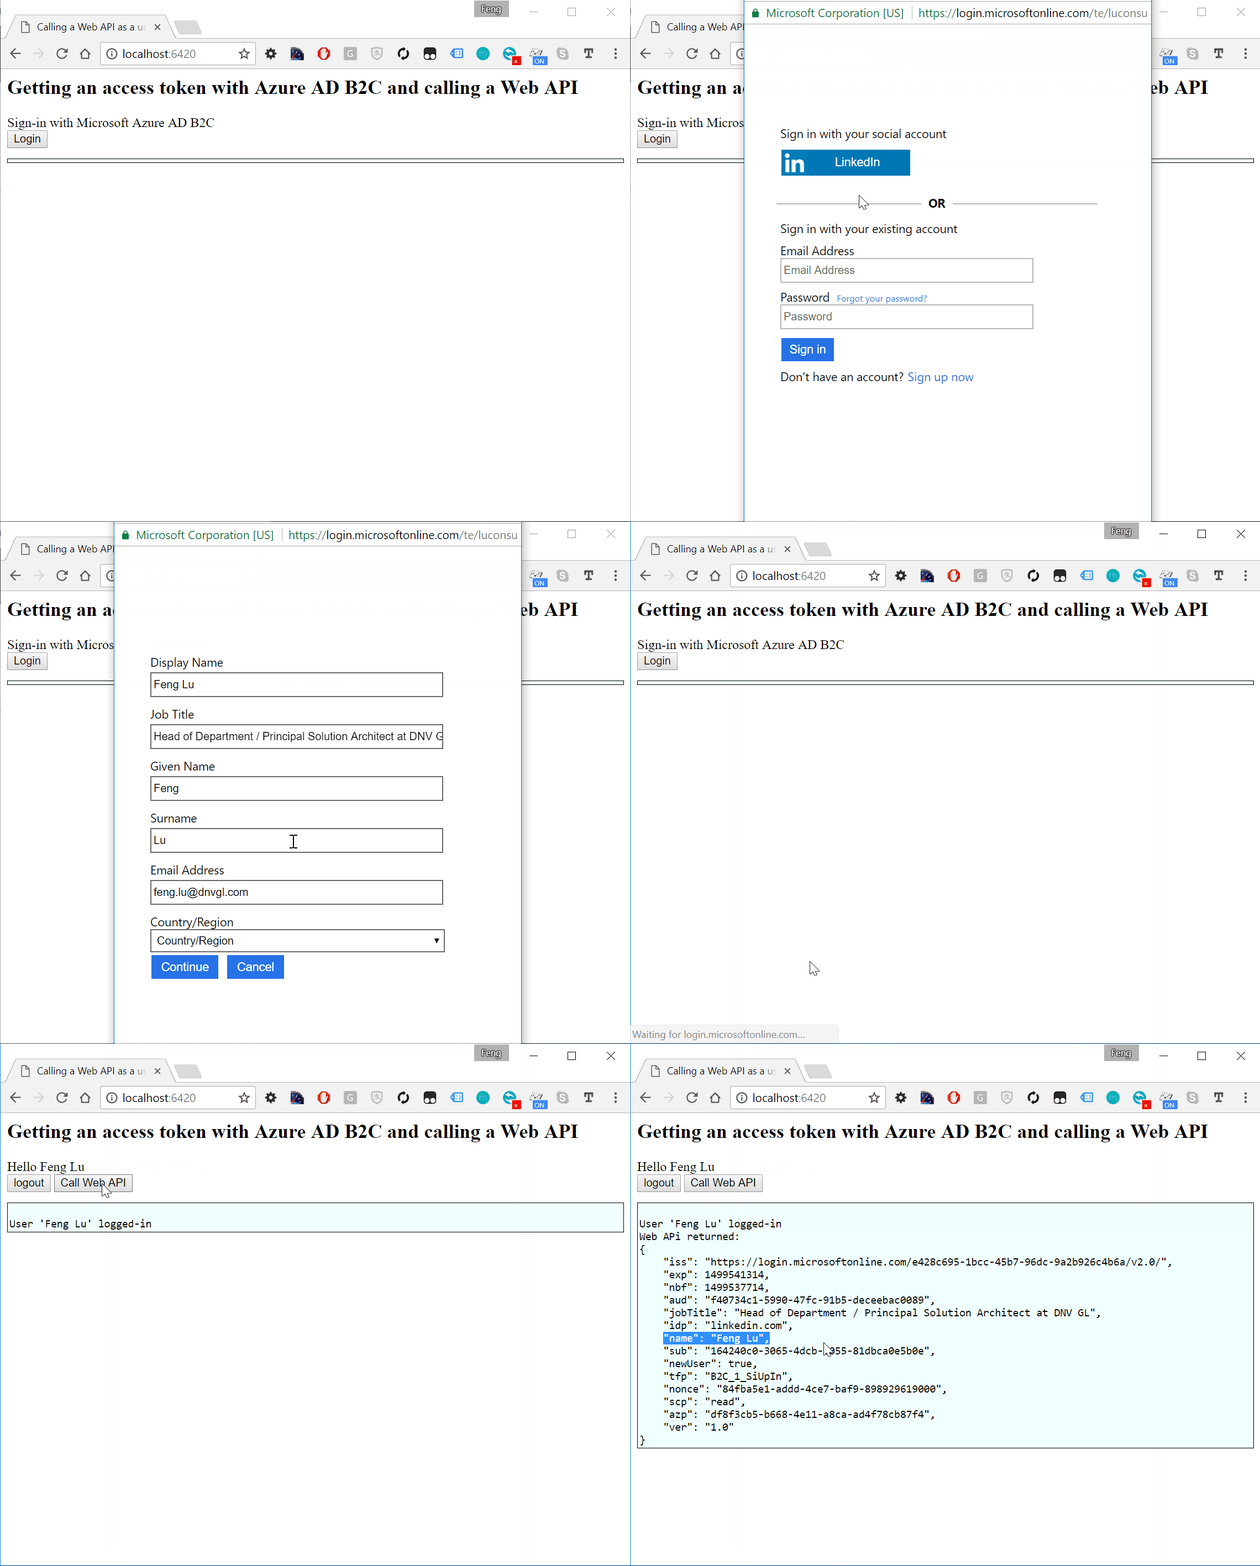
Look at the claim properties
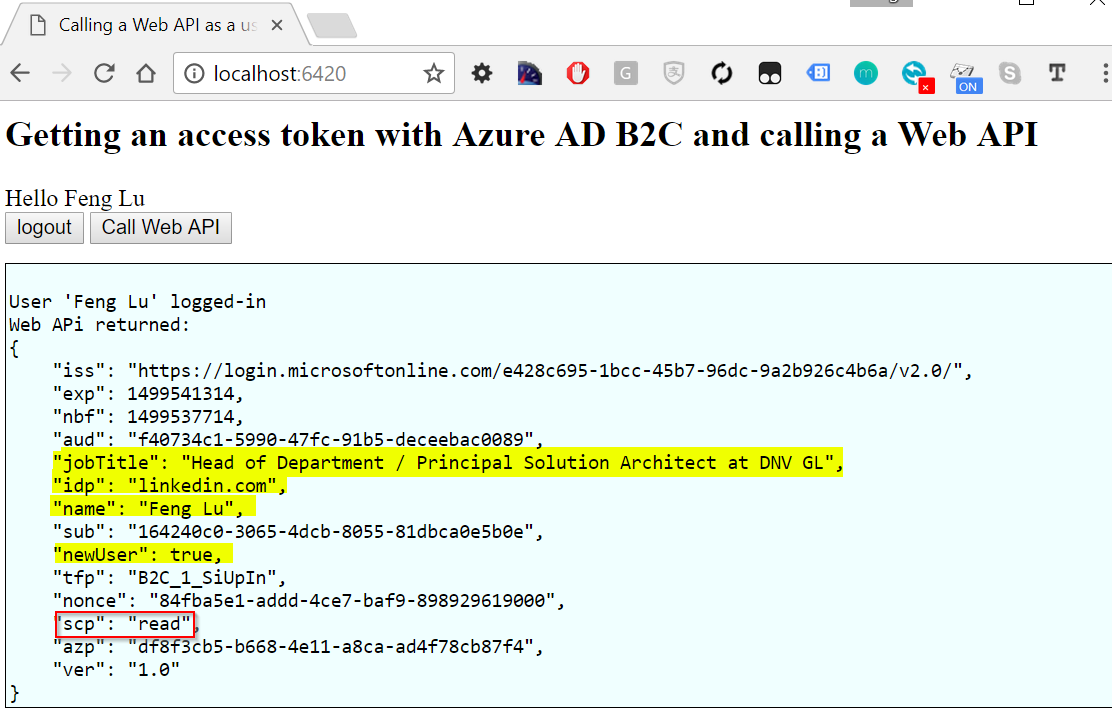
As you can see that most of the user properties are from my Linkedin profile. Since this is the first time I signin, the newUser is true.
Also verify that the new user is created in AAD B2C
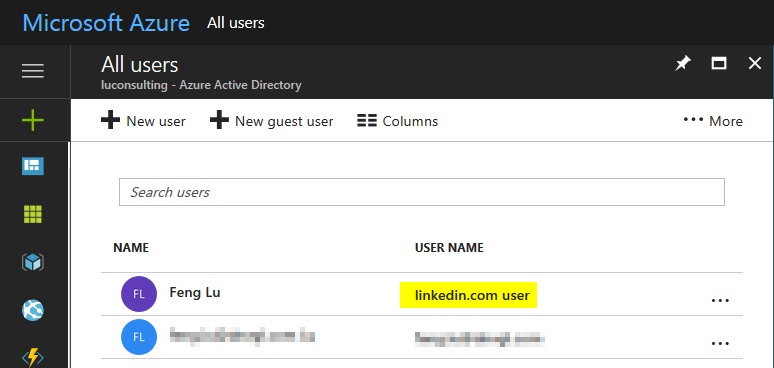
EOF.