Previously we have setup and published the hexo-based blog. The article source code and the hexo configuration files are under git version control.
Config theme, the wrong way#
As most hexo tutorials, the next step is to change the default theme. There are lots of themes that you can choose from. However, most of the theme simply ask you to clone itself under the themes folder.
In this case, we will use the popular theme NexT. Its document specified follow below steps:
- Install
1 | git clone https://github.com/iissnan/hexo-theme-next themes/next |
- Update the _config.yml to use this theme
1 | theme: next |
- Pull the theme update when it is needed
1 | cd theme/next |
The problem
For most of themes (including NexT), we will have to modify the theme’s _config.yml file which is under the theme folder, in order to:
- change the configuration on the theme level, such change theme style
- update personal information
- setup Google Analytic key
- integrate with 3rd party commenting plugin
- future customize the theme the way you want
Naturally, you would like to have above modifications also under version control, so you check them in and push to Git.
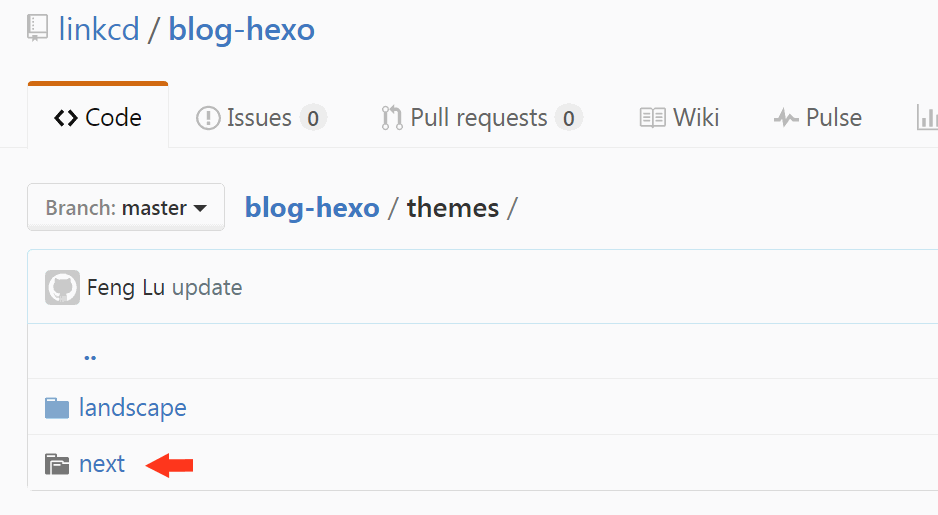
Now, if you head to Github source code page, you will find an interesting grayed-out folder named “Next”

You also lost the possibility to browse the theme source code there.
Root cause
Technically we created a nested git repository structure: there is a git repository “Next” underneath of git repository “Blog-Hexo”. This git document has a good explanation about this.
The right way
As our customized theme became an independent component component of the blog system, it requires proper version control of it.
Fork theme project
By doing this, you can properly version control your modification of your theme, but still have the possibility to keep it up-to-date. The fork version is https://github.com/linkcd/hexo-theme-next.Create Git submodule which named “next-linkcd” (means it’s our own version of NexT theme), and points to https://github.com/linkcd/hexo-theme-next.
1 | cd blog-hexo |
- Ask hexo to use our own theme
1 | theme: next-linkcd |
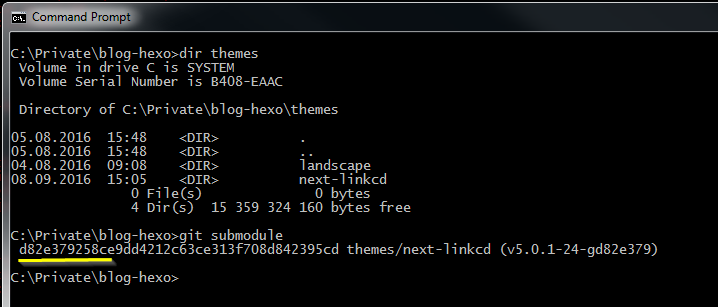
- Now you have 2 separated repositories, one for your blog-hexo, and one for your own theme. You can run below command to see the relationship.

It also works in Github webpage

Please note that the “git stamp” is d82e379 for both place.
Customize theme
Now you are free to modify your theme. To push theme changes back to Github, follow below:
- Git add, commit and push in next-linkcd folder
- Git add, commit and push in blog-hexo folder, even you have not modify anything in your blog.
Sync between two PC
1 | cd blog-hexo |
Restore your blog in a new PC
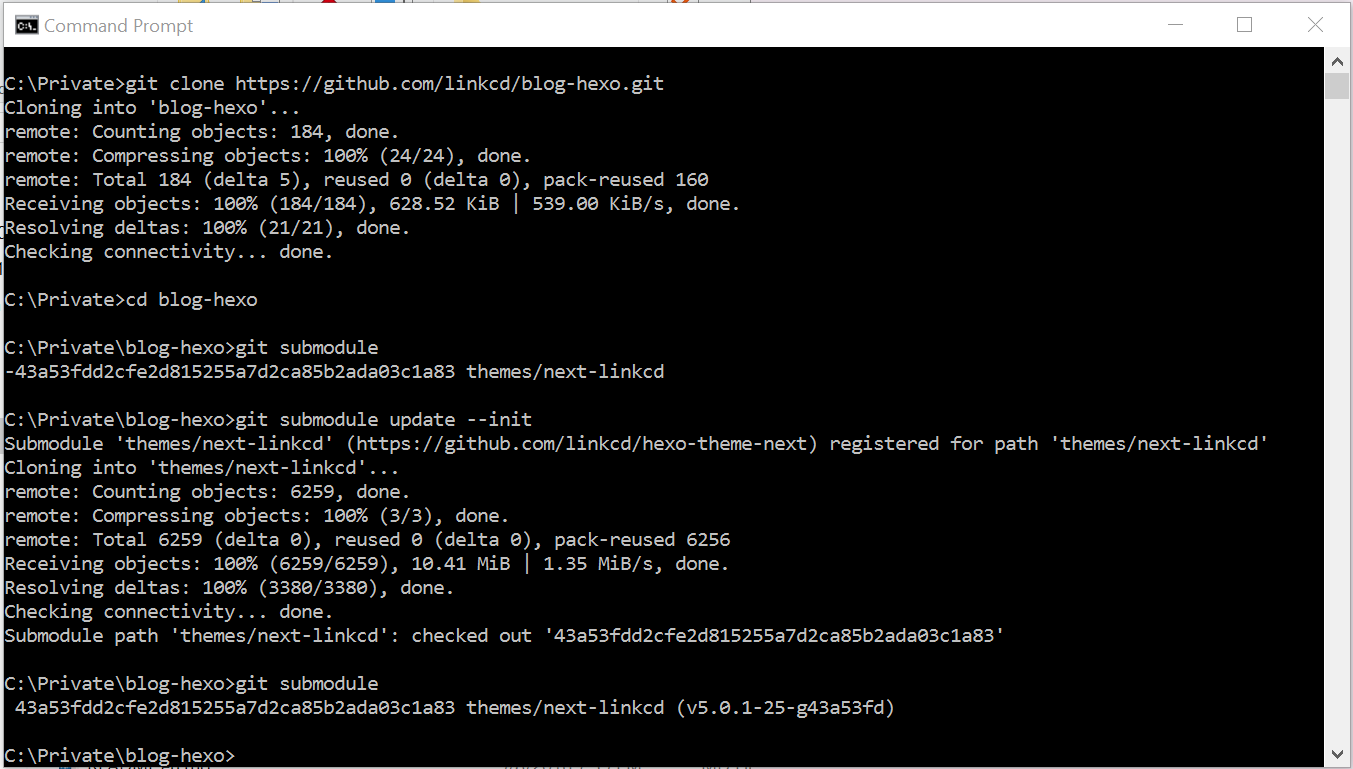
- Restore source code from Github and install hexo
1
2
3
4
5npm install hexo-cli -g
git clone https://github.com/linkcd/blog-hexo.git
cd blog-hexo
git submodule update --init
npm install hexo --save The last step is to reinstall hexo program. There is no need to re-install plug-ins.
 - Done